If you could only have one tool for electrical work, a multimeter should be it. Think of it as the stethoscope for diagnosing electrical issues.
Whether you’re figuring out why a light switch isn’t working, testing a battery, or building a robot, knowing how to use a multimeter is a fundamental skill.
At its core, a multimeter is a multi-tool that combines several electrical measurement functions into one device. The three most common are:
- Voltage (V): The electrical potential, like water pressure in a pipe.
- Current (A): The flow of electricity, like the flow rate of water.
- Resistance (Ω): How much a material opposes the flow of electricity, like a kink in a hose.
There are two main types: Analog (with a swinging needle) and Digital (with a digital display).
For this guide, we’ll focus on Digital Multimeters (DMMs), as they are the most common, easier to read, and more accurate for most users.

Safety First! Critical Tips Before You Start
Electricity demands respect. Following these safety rules is the most important part of learning how to use a multimeter.
Start with a Known Working Meter
Test your multimeter on a known voltage source, like a new battery, before using it on an unknown circuit.
Check Test Lead Insulation
Never use leads with damaged or cracked insulation.
Never Touch the Metal Tips
Always hold the probes by the insulated, colored handles.
Start with a Higher Range
When measuring an unknown value, start with the highest setting on the dial to avoid damaging the meter.
Be Extra Careful with Mains Voltage
Treat all household AC voltage as dangerous. If you are a beginner, practice on low-voltage DC circuits (like batteries and breadboards) first.
How to Measure Voltage (AC & DC)
Voltage is the most common measurement. It’s measured in parallel with the circuit, meaning you touch the probes to two points in a live circuit.
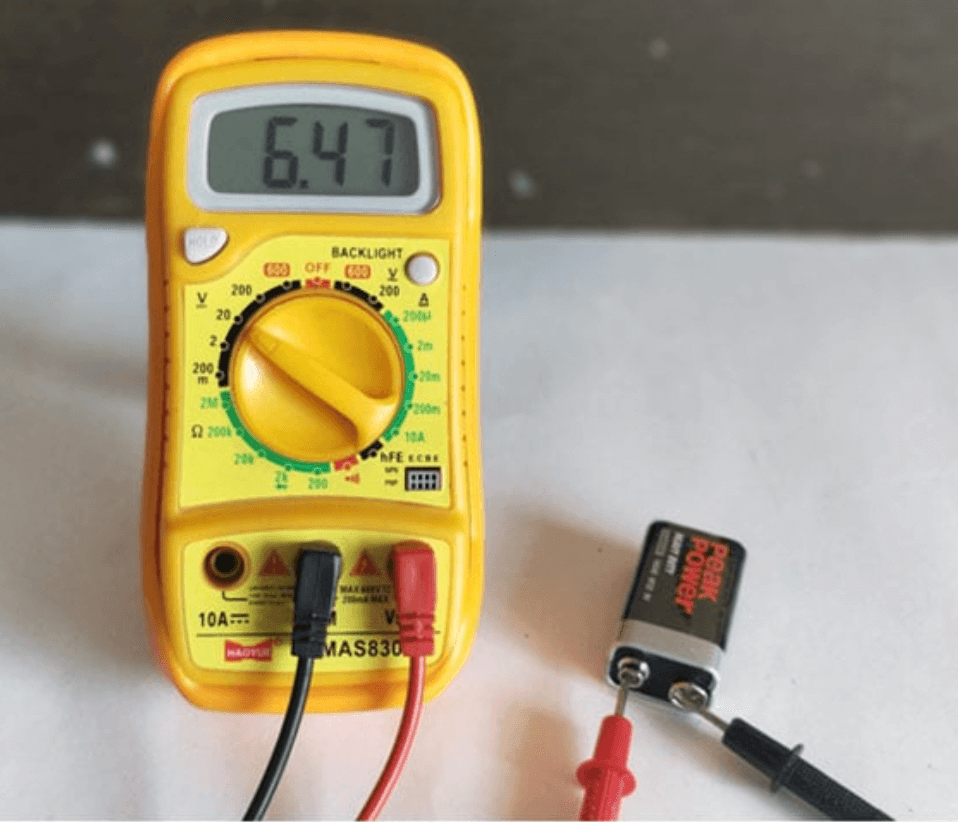
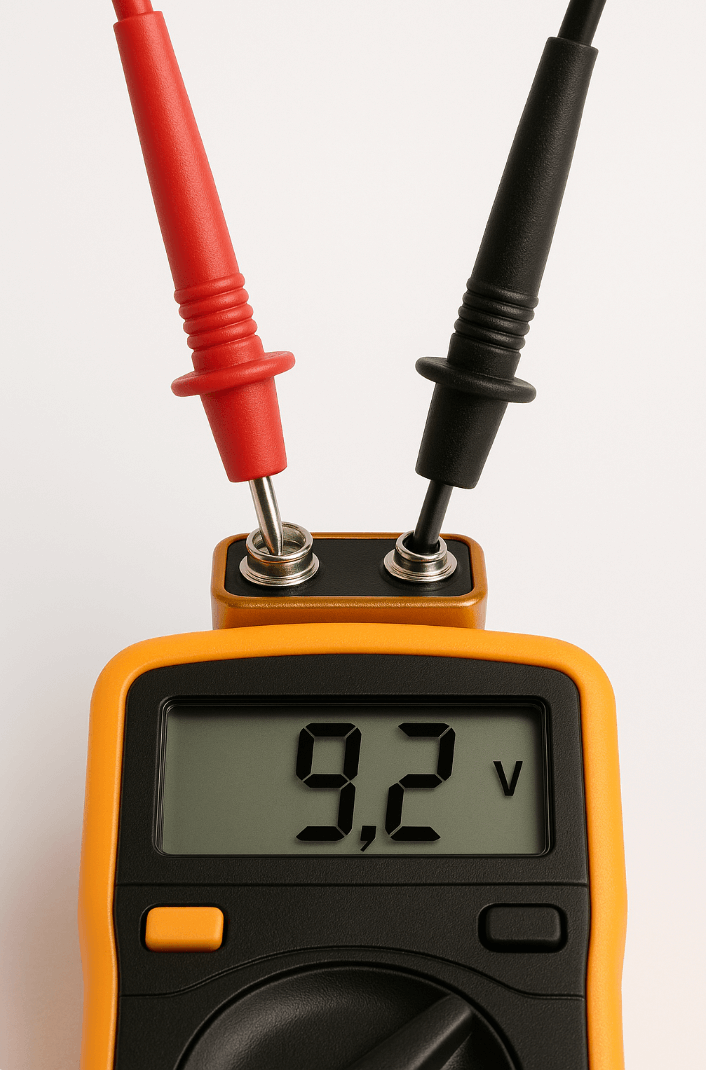
Step-by-Step: Measuring DC Voltage (e.g., a Battery)
- Plug in Leads: Black to COM, Red to VΩmA.
- Set the Dial: Turn the dial to the “V” with a straight line (⎓) for DC Voltage. If your meter has auto-ranging, you’re set. If it’s manual, choose a range higher than you expect (e.g., 20V for a 9V battery).
- Connect the Probes: Touch the black probe to the negative (-) terminal and the red probe to the positive (+) terminal.
- Read the Display: The screen will show the voltage. If you get a negative number, you’ve swapped the probes, this is harmless.

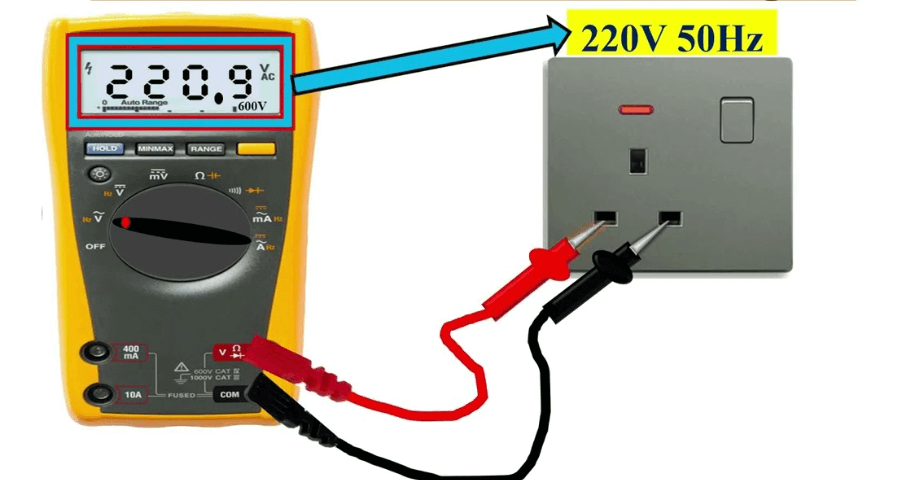
Measuring AC Voltage (e.g., a Wall Outlet) – USE EXTREME CAUTION
- Plug in Leads: Black to COM, Red to VΩmA.
- Set the Dial: Turn the dial to the “V” with a wavy line (~) for AC Voltage. Choose a range higher than 120V/240V, depending on your region.
- Connect the Probes: Carefully insert the probes into the outlet slots. It doesn’t matter which probe goes in which slot for AC.
- Read the Display: You should get a reading close to 120V or 240V.

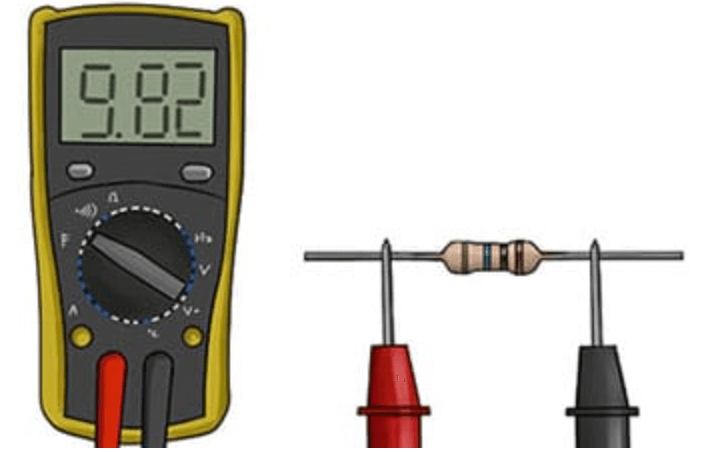
Step-by-Step: Measuring Resistance of a Resistor
- Plug in Leads: Black to COM, Red to VΩmA.
- Set the Dial: Turn the dial to the Ohm symbol (Ω).
- Connect the Probes: Touch the probes to each end of the resistor. The orientation doesn’t matter.
- Read the Display: The meter will show the resistance in Ohms (Ω), kilo-ohms (kΩ), or mega-ohms (MΩ). Compare it to the resistor’s color bands.

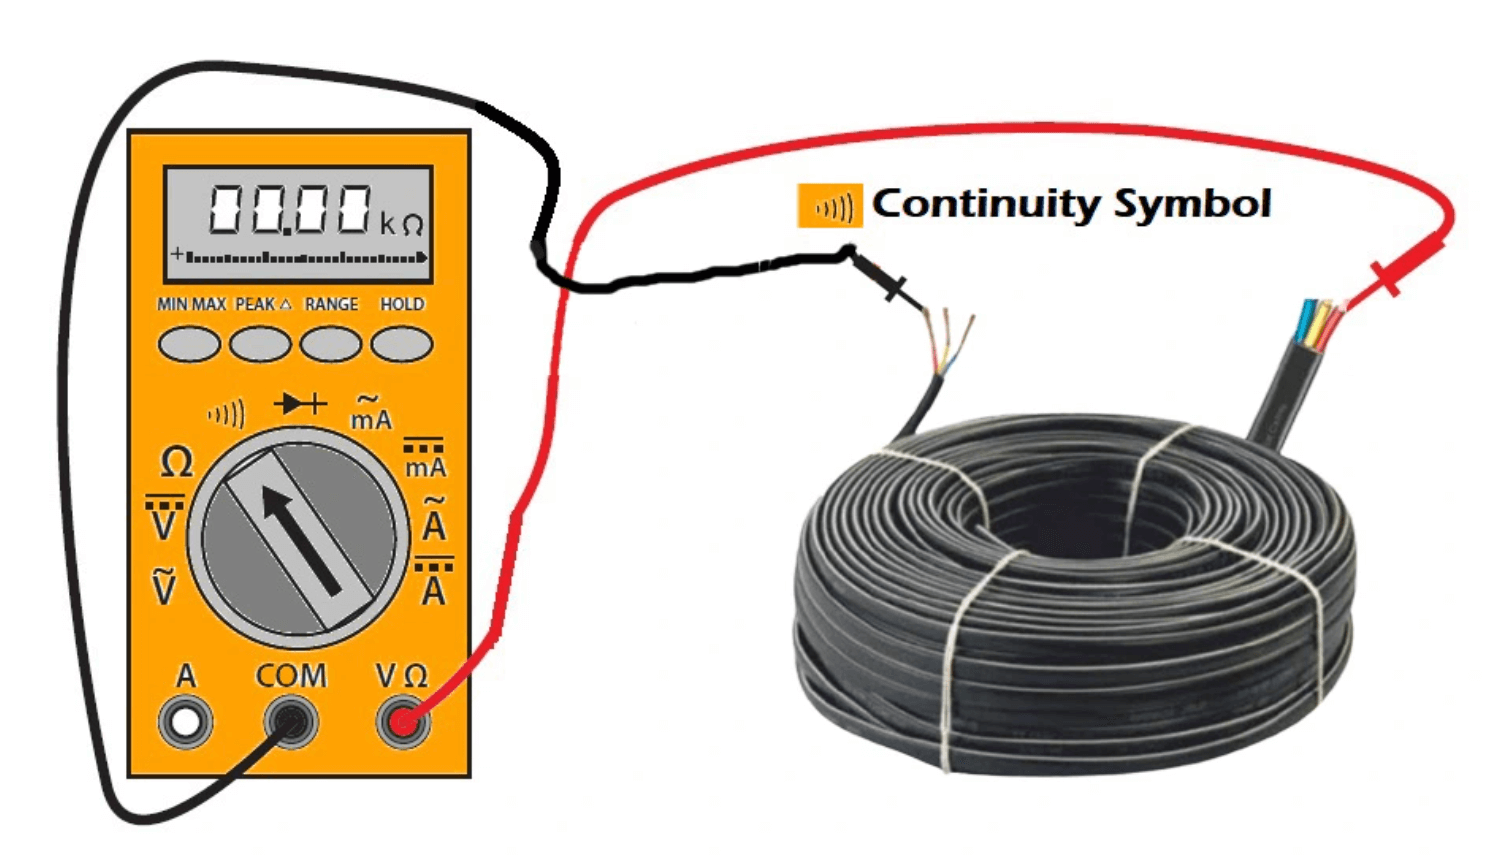
How to Test for Continuity
This is my favorite function for troubleshooting! Continuity tests if two points are electrically connected.
A good connection (like a closed switch or unbroken wire) will cause the meter to emit a continuous beep.
Step-by-Step: Checking a Fuse or Wire
- Plug in Leads: Black to COM, Red to VΩmA.
- Set the Dial: Turn the dial to the continuity symbol (⋅⋅⋅) or a diode symbol (➲). This is often combined with the resistance setting.
- Test the Meter: Touch the two probe tips together. You should hear a clear beep, confirming the function works.
- Test the Component: Touch the probes to both ends of a fuse or wire. A beep means the fuse/wire is good (it has continuity). No beep means the path is broken and the component is faulty.

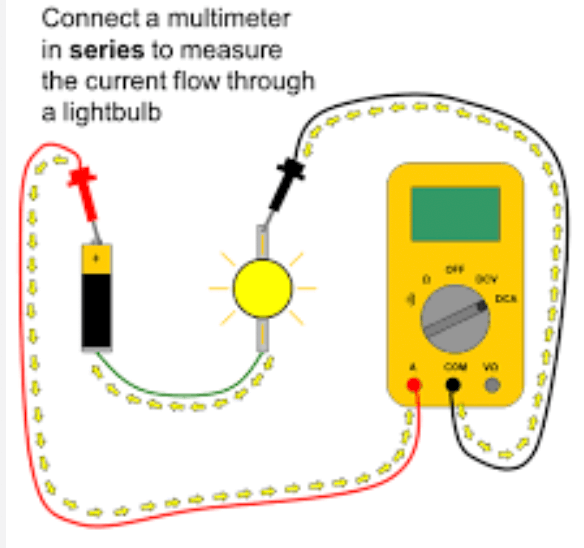
How to Measure Current (AC & DC)
Warning: This is the most dangerous function for your multimeter if done incorrectly. Measuring current requires the meter to be part of the circuit, meaning electricity must flow through it.
Step-by-Step: Measuring Small DC Current
- Plug in Leads: Black to COM, Red to VΩmA.
- Set the Dial: Turn the dial to the “A” with a straight line (⎓) for DC Current. Start with the highest current range (e.g., 10A).
- Break the Circuit: You must interrupt the circuit and place the multimeter in series. This means the current flows from the circuit, into the red probe, through the meter, and out the black probe back into the circuit.
- Read the Display: The meter will show the current in Amps (A) or milliamps (mA).

Common Multimeter Uses & Troubleshooting Scenarios
Testing a Battery
Use the DC Voltage setting. A 9V battery reading below 8.5V is likely dead.
Checking a Light Switch
Use the Continuity setting. With the power OFF, test across the switch terminals. It should beep when ON and not beep when OFF.
Identifying Wires
Use the Continuity setting. Connect one probe to a known wire end and touch the other to unknown ends until it beeps.
Key Takeaways: How to Use a Multimeter
Learning how to use a multimeter unlocks a world of DIY electrical and electronic projects.
Start with the basics, voltage and continuity, in safe, low-voltage environments. Always prioritize safety, and soon you’ll be diagnosing problems with confidence.
Remember, a multimeter is not just a tool; it’s your window into the invisible world of electricity.
Now, go grab your meter and start testing
FAQ: How to Use a Multimeter
What is the difference between auto-ranging and manual multimeters?
An auto-ranging multimeter automatically selects the correct measurement range for you.
You just set the dial to “V” for voltage, and it figures out if it’s millivolts or hundreds of volts. This is great for beginners.
A manual multimeter requires you to select the approximate range yourself. If you’re measuring a 12V car battery, you’d select the 20V DC range, not the 200mV range. Manual meters are often cheaper but require a bit more knowledge.
Can a multimeter measure AC current?
Yes, most multimeters can measure AC current (using the “A~” setting), but it is less common and can be more dangerous than measuring DC current.
For measuring mains AC current, a much safer and more convenient tool is a clamp meter, which can measure current by clamping around a wire without breaking the circuit.
For most DIYers, measuring AC voltage is sufficient for troubleshooting household issues.
Why does my multimeter show 0L or 1 when I try to measure?
When you see 0L (overload) or 1 on the left side of the display, it means the value you’re trying to measure is outside the selected range. This is very common with manual-ranging meters.
When measuring voltage or current
The value is too high for the selected range. Turn the dial to a higher range (e.g., from 2V to 20V).
When measuring resistance
The value is infinite, meaning there is no electrical path (an open circuit). This is what you’d see when testing a broken wire or a blown fuse.
What does it mean if my resistance reading is 0 ohms?
A reading of 0 ohms (or very close to 0, like 0.4) indicates a short circuit or a perfect conductor.
There is virtually no resistance to the flow of electricity. For example, this is what you’d see if you touched the two probes together or tested a piece of pure, unbroken copper wire.
How do I test if a fuse is blown without power?
Use the Continuity Test function.
- Remove the fuse from the circuit.
- Set your multimeter to the continuity mode (the sound wave symbol ⋅⋅⋅).
- Touch a probe to each metal end cap of the fuse.
- If you hear a beep: The fuse is good, and the internal wire is intact.
- If there is no beep: The fuse is blown, and the circuit is broken inside.
Can I get shocked using a multimeter?
The risk exists, but you can minimize it by following safety protocols. The danger is highest when measuring household AC voltage. Always:
- Use leads with proper insulation.
- Never work on a live circuit with wet hands or in a damp environment.
- Set the meter to the correct function before connecting the probes.
For low-voltage DC circuits (batteries, car electronics, Arduino projects), the risk of a dangerous shock is extremely low.
What should I look for when buying my first multimeter?
For a beginner, I recommend a basic digital auto-ranging multimeter. Key features to look for:
- Auto-ranging (simplifies use)
- Continuity test with audible beep (invaluable for troubleshooting)
- Diode test function
- Overload protection (safety feature)
- A sturdy build and a clear stand. You don’t need a professional-grade Fluke for home use; brands like AstroAI, Innova, and Klein Tools offer excellent entry-level models.
